The Check Out process links a patron record to an item record, and assigns a due date according to the library’s loan rules
Getting to Check Out
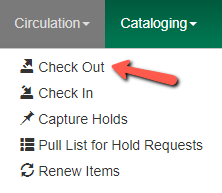
Go to Check Out from the Circulation menu or from the link under the Circulation and Patrons heading on the Portal Page.

Retrieve the Patron Record
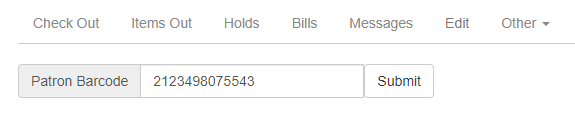
Scan the patron’s barcode and click Submit.
Search for Barcode
If the patron doesn’t have their card available, there’s a Patron Search link on the Check Out page on the right. You should ask for identification or check for information to make sure you have the right record.

Scan Item Barcodes
The checkout tab is open and you can begin scanning item barcodes. The Strict barcode option at the bottom of the screen should always be checked unless you need to check out an item that uses something other than the standard 14 digit barcode.

As you enter barcodes, the items will be checked out and will be added to the grid at the bottom of the screen with the most recent checkout on top.

Complete the Transaction
Once you have completed scanning all the items, you can click on either the Quick Receipt or Done button to complete the transaction.
You know which method this will be because there will either a printer icon for a printed receipt, or an envelope icon for an email receipt.
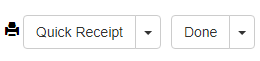
Selecting Done in this example will complete the transaction, print a receipt, and close the patron record.
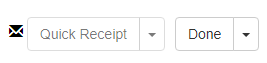
Selecting Done in this example will complete the transaction, email a receipt, and close the patron record.
The difference between Quick Receipt and Done is that Quick Receipt will leave the patron record open if you need to perform other transactions for the patron, and Done will close the record.
Each button is also a dropdown menu, allowing you to choose the other receipt option in case the patron usually prefers email but wants a print receipt this time, or the other way around. The Done menu button also has the No Receipt option.

Selecting either Email Receipt or Print Receipt from the Quick Receipt menu will email or print the receipt and leave the patron record open.

Selecting the No Receipt option will complete the transaction and will close the patron record with no receipt. Selecting either Email Receipt or Print Receipt will complete the transaction, send the receipt to email or to the printer, and close the patron record.
Specific Due Dates
Circulation periods are set by the library’s loan rules. When items are checked out, due dates are automatically calculated and inserted into circulation records unless the Specific Due Date checkbox is selected on the Check Out screen.


The Specific Due Date checkbox allows you to set a different due date to override the standard loan period. Before you scan the item, select the Specific Due Date checkbox. Enter the date in yyyy-mm-dd format, for example: 2022-11-23. This date applies to all items until you change the date, de-select the Specific Due Date checkbox, or quit the patron record.